
Meringue Mushroom Recipe
April 24, 2019
Prep Time: 45 minutes Cook Time: 1 hour 30 minutes Total Time: 2 hours 15 minutes
Ingredients:
2 large egg whites (room temperature)
1/2 cup granulated sugar
1/8 tsp salt
1/8 tsp cream of tartar
1/4 cup semi-sweet chocolate chips, melted
Kitchen Tools
Large cookie sheet
Parchment Paper
Wilton 2A tip with a piping bag
Instructions
Prep: Preheat Oven to 200° F. Line a large baking sheet with parchment paper (not wax paper).
- Add 2 egg whites, 1/2 cup sugar, 1/8 tsp salt and 1/8 tsp cream of tartar and beat with whisk attachment on high speed 7 min or until you have glossy ribbons and the peaks stay fairly stiff (cold whites take longer).
- Transfer meringue to pastry bag fitted with a 3/8″ round tip and pipe onto lined cookie sheet (about 1″ apart).
- Mushroom caps should look like large chocolate kisses (1 1/2″ diameter at the base) with the tip swirled into the side so you get an even top. If you’re a perfectionist; you can smooth the mushroom caps with a wet fingertip. Mushroom stems should look like slimmer/taller kisses (3/4″ diameter at the base) and tips pointed up.
- Bake at 200˚F for 1 hour 30 min. They should slide easily off the parchment paper easily when they are done. Remove from oven and pull the parchment paper off the baking sheet . Let cool on the paper completely to room temp. They will harden as they cool.
- Assemble the mushrooms by combining the cap and stem. Rotate the tip of a small paring knife in the center of each mushroom cap to cut a small hole just large enough to fit the tip of the base.
- Melt chocolate and transfer into a ziploc bag. Snip off a tiny hole from the corner of the bag and pipe chocolate into the holes of meringue. Stick the bases into the holes and leave them upside-down until chocolate hardens and sets.
- Dust the tops and stems lightly with cocoa powder. If you like, you can smudge the cocoa powder with your fingers to give them that natural dirty glow. This can be done before or after you assemble the mushrooms, whichever works best for you.
Subscribe to the Organize-It blog for more organization tips and tricks. Learn more at Organize-It.com
10 Ways on How to Organize Your Home on a Budget
April 22, 2019
by Laura Sage
Organizing your home can seem like it’s out of your reach budget wise. However, there are tons of things you can use to organize your home that aren’t expensive. You can basically just reuse a ton of items that you already have on hand and make them fit your organizational needs for your home. This will make organizing your home more budget friendly for you and you will not have to worry about spending money on a bunch of new storage items.
Most of the things on the list below are things that you already have in your home or things that you buy on a regular basis. This means you’re not actually spending any money out of pocket, you’re just repurposing items that you already have laying around your house or items that you currently just toss in the trash after you’re done with.
- Boxes: Boxes come in all shapes and sizes. You get them when you order things online, you get them when you buy shoes. Repurposing a box that you bought something else in is a great organization method. Shoe boxes are the best because they have lids on them so it makes it easier to store and not lose things in the process.
- Food Containers: What do you do with your empty food containers such as sour cream or butter bowls? Most people just throw them away, however they are a great tool to use to organize small things in for storage after they are washed out!
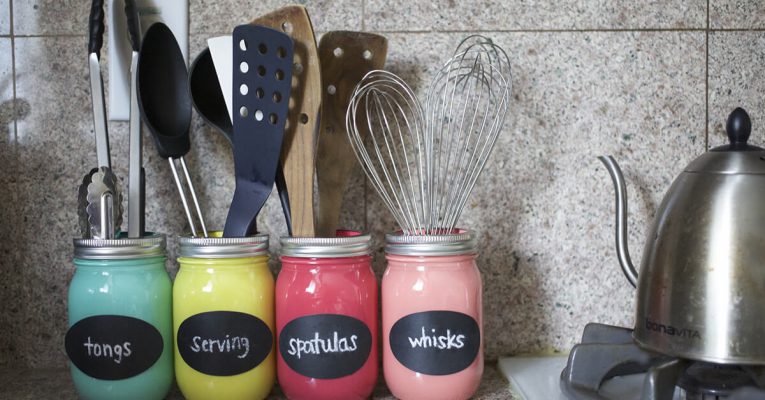
- Glass Jars: Glass jars are great for organizing pencils, pens, crayons, markers or any other office supplies. If you buy mayonnaise, jelly, pickles, or peanut butter those containers would work well too.
- Baskets: If you have spare baskets laying around, they are great to repurpose for storage as well. They are great to organize toys, clothes or beauty items if the basket is small enough.
- Hangers: Hangers are great to organize your clothes better. Instead of having to store them all separately you could put the clothes on hangers based on the entire outfit. If you put the entire outfit on one hanger, this makes more room in your closet too! You can also organize your belts or ties on hangers to maximize space and keep them from getting tangled up.
- Mismatched Tupperware: If you have old bowls that do not have lids to fit them any longer you can repurpose them for storage purposes instead of tossing them because you no longer have a lid for it. Smaller bowls are great to put inside your drawers to organize things inside them.
- Binders: You can use an old binder to store all of your important papers in, to store menus in, or even to store recipes in. If you have all of your papers in one space then you will no longer have to search for them when you need them.
- Command Hooks: You can organize your jewelry by hanging command hooks on the inside of your closet door and this will ensure that you no longer have tangled up necklaces or bracelets to dig through. You can also organize your jackets, belts or other items on command hooks as well.
- Shoe Organizer: You can use a shoe organizer for a lot more things than just shoes. You can organize school supplies, office supplies, food items for your pantry, makeup, nail polish, and just about any other thing that you own a large amount of. A shoe organizer is great for storage because most of the time it’s clear and you can see what item you’re reaching for when you’re looking for something.
- Baby Wipe Boxes: If you have old baby wipe boxes laying around they are great for storing lots of things in. If you have tons of grocery bags they are a great dispensary system for them. They also work great for a crayon or pencil box. You can store lots of other things in them as well.
There are tons of way that you can organize your home at little to no money out of your pocket. You just have to know how to repurpose items that you already have. We listed a few ways, but there are tons of other ways that you can organize your home as well.
Be creative with the items you have in your home and make your home comfortable to all of your visitors instead of a cluttered place to walk into. It’s hard to organize clutter, so make sure you get rid of some of those items you don’t need before you begin!
Author’s Bio:
Laura Sage is the manager of Amish Furniture Factory since 2013. She’s a professional when it comes to hardwood furniture and home decor.
Tips for Planning and Organizing Your First Cruise
April 15, 2019

Guest blog by Kacey Mya, the blogger behind The Drifter Collective
You’ve seen others encounter new places and experiences on exciting cruises, and now it’s your turn to journey on a cruise ship. Vacationing directly on the water, stopping at captivating ports and relaxing in the sun are all in store.
But as a first-timer, you need the best strategy for organizing the trip and planning your itinerary. Before you make definitive plans, you’re looking for the best approach to get your cruise in order. Here are eight tips for arranging your first cruise.
1. Set a Budget
Unless you opt for an all-inclusive cruise,  you’ll have to set aside money for each day. According to Cruise Market Watch, each passenger spends approximately $212.80 per day of their trip. Depending on the cruise line you choose, reserve at least $200 to $300 per day to cover drinks, restaurants, shopping and on-shore activities.
Keep track of how much you’re spending, because the available amenities and resources are easy to indulge in. Also, the different levels of cabins can change your cost. Allow yourself room to splurge while maintaining a reasonable budget.
2. Consider Who’s Going
Figure out who you’ll be traveling with on your cruise. Are you going with family? Are your friends getting together for a special occasion? If you’re going with a group, your planning involves other people and preferences. So, take them into account and meet with them to discuss the destination and timeline.
On the other hand, traveling solo can simplify and improve your planning. You can prioritize your desires and give yourself the opportunity to embrace exploration on your own. Whatever your reason for taking a trip by yourself, you can freely manage your time the way you want.
3. Determine the Length of Your Trip
On your first voyage, settling on a set time away from home can be tricky. You don’t know how entertained you’ll be after a few days or what to expect on your excursions. But the beauty of a cruise is that a variety of options abound. For your first trip, a weekend or weeklong cruise can give you a taste of the experience.
4. Choose a Destination
Because the ocean provides plenty of access to stunning locations, you have several destination options to weigh. As you contemplate which destination is best for you, research the port stops to find which coastlines offer activities you like. You can visit islands in the Caribbean for a tropical ambiance or head toward Alaska for a mountain setting.
5. Pick the Right Season
Weather and the time of year for your getaway are significant factors in booking a cruise. Fair seasons bring more travelers, especially in tropical places, but the offseason can offer better deals. With more free time for families in the summer and winter, you can often avoid the crowds by choosing a spring or fall cruise.
6. Schedule Enjoyable Activities and Excursions
During a cruise, your ship will stop at ports along its route for a few hours or overnight so you can explore new areas. These locations offer a chance to wander through markets, see local attractions or try thrilling activities. You can take tours with your ship or independently adventure based on your interests.
There are entertainment opportunities on board, too. You can participate in spa treatments, hang out by the pool, see a performance or join casino activities.
7. Pack for All Occasions
While you’re on a cruise, you’ll participate in everything from sunbathing and exploring ports to fancy dinners. Pack comfortable clothes for excursions and elegant options for dining. Many cruise lines have specific dress codes for certain areas, so familiarize yourself with the recommended wardrobe around the ship.
8. Select a Cabin
Each cabin has unique advantages that set them apart. You can stay in a windowless cabin to save money, or you can enjoy a breathtaking view with a balcony cabin. Porthole or window cabins can be a happy medium. Expansive suites are an extravagant rooming selection for those who want convenience and luxury.
Embark on Your First Cruise
As you organize your first cruise, you can consider what will make your ideal trip. Plan with your budget, preferences, destination, companions and the weather in mind. Start booking a relaxing cruise vacation today.
Subscribe to the Organize-It blog for more organization tips and tricks. Learn more at Organize-It.com.