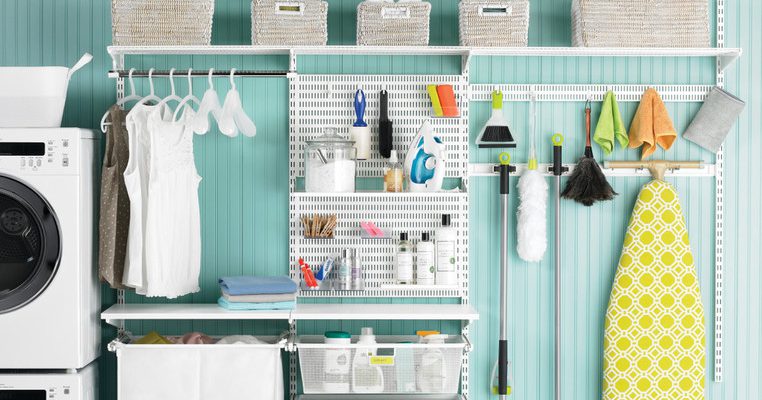
Laundry Room Space Savers
August 19, 2019
1. Collapsible Drying Rack

Freestanding drying racks take up a lot of space in the laundry room, but you can maximize the available space with a wall mounted drying rack.
This Telescoping Wall-Mount Drying Rack is designed to expand in depth so you can easily hang clothes up to dry. Mount the drying rack above the dryer to save additional space in the laundry room.
Other drying racks are available so you can lay clothing flat to dry. The Mesh Sweater Drying Rack is designed to keep your clothing flat when it dries, and you can stack multiple racks together to save on space.
2. Slim Cart

Is there a small space between your washer and dryer? Take advantage of the unused space with a slim rolling storage cart.
The shelves allow you to store everything from launder detergent to stain remover, allowing you to store the products you need right where you need them. Most slim carts feature rolling casters so you can easily pull the cart out as needed.
3. Hanger Valets

Hanger valets and holders are ideal for creating and maintaining a more organized laundry room or closet. These hanger holders are ideal for hanging clothes to air dry or storing clothing fresh out of the dryer.
The hanger valet folds out for easy use and then folds flat to the wall when not in use. Several styles and colors are available to complement most any space.
If you’re limited on space, we also offer over the door options that do not require tools or hardware to install, and are great for use in laundry rooms, closets, and bedrooms.
4. Fold-Out Ironing Board

Use a fold-out laundry board to save space in the utility room while giving yourself a handy place to iron wrinkles out of garments. You can also use the ironing board to fold clothing before distributing them to their owners.
Most fold-out ironing boards are designed to mount to the wall or into the wall. The ironing board pictured is designed to attach over the door to eliminate the need for permanent installation.
Can’t accommodate a fold-out ironing board? No problem! Use an Iron and Iron Board Holder to keep both your ironing board and your iron conveniently stored. These space-savers are designed to mount to the wall or hang over the door in order to save space in the utility room.
Subscribe to the Organize-It blog for more organization tips and tricks. Learn more at Organize-It.com.
A Guide to Purging Your Clutter Properly
August 12, 2019
Guest blog by Alex DeMarzo
Decluttering your home is the first step to a cleaner and more organized house. But decluttering can quickly turn into a disaster if you aren’t prepared. Luckily, there are a few simple steps you can take to ensure the task of decluttering turns your house into the home of your dreams instead of your nightmares. This guide to purging your clutter properly will ensure you tackle the task of decluttering the right way.
1. Make a Plan
The first step to any project is to make a plan, and decluttering is no different. Before you start clearing out your rooms, take a few minutes to sit down and set some goals for yourself. Outlining specific goals of the decluttering process will give you a sense of accomplishment and help guide you through each step of the process. So, start by asking yourself a few simple questions:
- What do you hope to accomplish from decluttering?
- How much time do you have to devote to decluttering?
- Which rooms need the most decluttering? Which rooms need the least amount of work?
- What do you plan to do with the items you want to get rid of? If you plan to donate them, where will you take them?
The answers to these questions will help you create a detailed plan for decluttering, including a map of the rooms you want to declutter, how long you will spend on decluttering each room (as well as how long you’ll spend on the process as a whole), and how you plan to clear the clutter out of your house as you work to declutter each room.
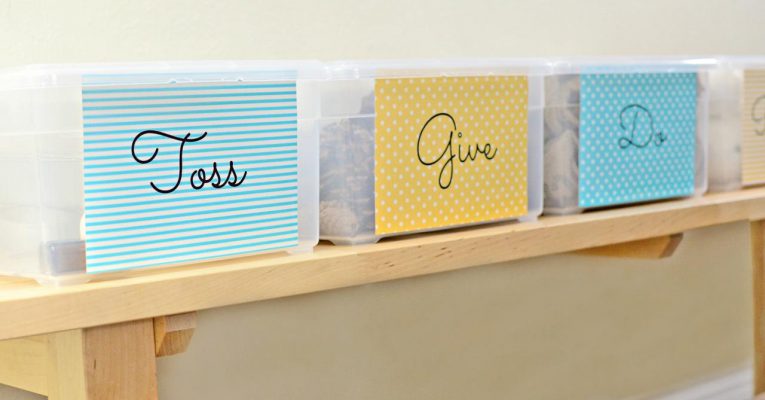
2. Create a System
As part of your decluttering plan, it’s also a good idea to create a system for organizing each room of your house. One simple way to stay organized as you declutter a room is the three-pile method. Using this method, you will sort items in each room into three piles: keep, throw away, and donate. As you sort through the items in your room, declutter one item at a time – asking yourself whether you want to keep, throw away or donate that particular item.
- Keep items you use often, are a necessity, or have great sentimental value. However, keep in mind that everything you keep will need a designated home. So, be sure you have the space for each item you keep before placing it in this pile!
- Throw away items that are broken, clothing that is ripped, paper clutter you don’t need anymore, etc.
- Donate items that you don’t want or need but are still in good condition.
3. Take Your Time
Decluttering your home is a long process, which means it’s not something you can accomplish in a day. Taking your time to declutter your house will make the process less stressful, ensuring you actually complete it instead of giving up halfway through! It’s best to plan your decluttering schedule based on the amount of time you estimate it will take to declutter the space. Leave rooms with more clutter, like the basement, kitchen, or garage, for times when you have an extended time period available to work on the space, like the weekends. Less cluttered areas can be tackled in the evenings or whenever you have spare time to complete the project.
4. Give Everything a Home
The end goal of decluttering is a more organized home. So, taking the time to organize the items you keep as you declutter will help make your organizational dreams a reality. One of the best ways to ensure your house stays organized and orderly after you’re finished decluttering is to make sure everything has a home. As you sort through your items and decide which ones to keep, you also need to make a plan for where each item will go when you’re finished decluttering.
As soon as you’re finished cleaning out a room, take the time to move your piles to their designated areas. That means all the items you plan to throw away will go to the trash bin outside, and each item you plan to donate will go to your car so it can be dropped off at your favorite charity. Finally, you should place everything you plan to keep in its designated spot and make sure it stays there.
5. Don’t Add More Clutter
The second you begin the decluttering process, you should also be sure to be mindful of the amount of clutter you bring into your home. That means making sure the time you spent decluttering isn’t wasted by adding more clutter to your home. Before buying new items for yourself and your house, take a few minutes to ask yourself if you need it and where you will put it when you bring it home. This simple exercise will ensure your home stays organized and decluttered for good!
Subscribe to the Organize-It blog for more organization tips and tricks. Learn more at Organize-It.com

Back to School: The Dorm Room Checklist
August 9, 2019
Are you sending your kiddo off to college? Make sure they pack everything they need for an extended time away from home with this dorm-room checklist! From furniture to electronics, make sure your college student has everything they need to study hard this semester!

Subscribe to the Organize-It blog for more organization tips and tricks. Learn more at Organize-It.com